Using Pentaho to Read data from Salesforce and Publish to Socrata
This example shows how to use Pentaho Kettle Data Integration (which we will refer to just as “Kettle”) to:
- Read data from multiple Salesforce objects related to volunteer tracking
- Update a Socrata dataset
- Automate this process so it can run unattended
Pentaho Kettle
Kettle is a free, open source ETL software. The tool’s abilities can be separated into 4 phases: Extract, Transform, Load, and Automate.
- Extract: The user can connect directly to a myriad of source systems. Some examples are: SQL Server, Microsoft Access, SAP, and Salesforce. When the data in these source systems is updated, Kettle can be used to fetch a new extract.
- Transform: Often times the raw data directly from the source is not in the desired format for presentation. For example any Personally Identifiable Information (PII) would need to be masked before publishing. In this example we will cover how to create an attribute that the Socrata platform can geocode.
- Load: Data can be published directly into the platform via the Socrata Output plug-in.
- Automate: By creating a Pentaho job file (
.kjb), transformations can be run on a scheduled basis.
The plug-in uses DataSync under the hood to update the dataset. Users familiar with this tool will be ahead of the curve with this plug-in.
Before continuing on, please follow the link, download, and configure the plug-in within your Pentaho Kettle instance.
Kettle with Salesforce and Socrata
Step 1: Extract Data from Salesforce
- Open a new Transform file (
.ktr) - Go to
Design > Input > Salesforce Input - For the your credentials, use your Salesfroce Security Token
- For example:
mypassword12343mysecuritytoken45678 - To generate a Security Token go here or search for Salesforce Security Token
- For example:
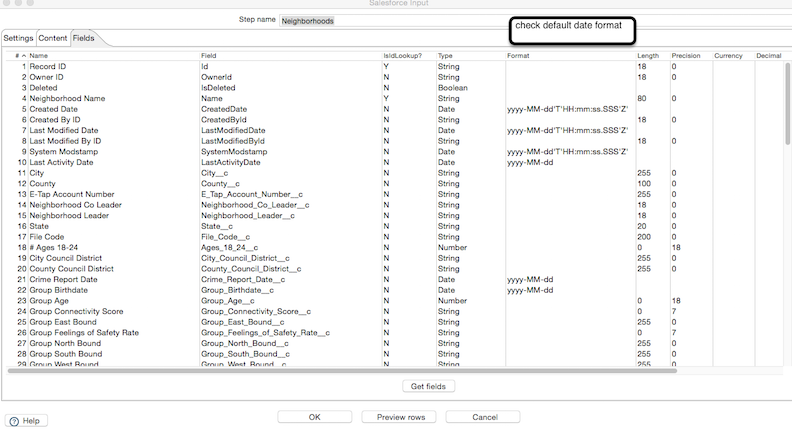
- Select the Salesforce object you want to connect to. Don’t know which Salesforce objects you’re looking for? Try using the Salesforce Schema Builder to see which objects house the desired attributes.
Gotcha: The default date formatter can sometimes incur errors. Try pressing play on the workflow after connecting to the Salesforce object. If the log file mentions a date error, try adjusting the format in the Input.
Step 2: Join, Transform, Hide PII, and Geocode
In this example I have connected to 3 different objects. Now I need to rename fields, filter out others, join the objects, and create a field for the Socrata platform to geocode.
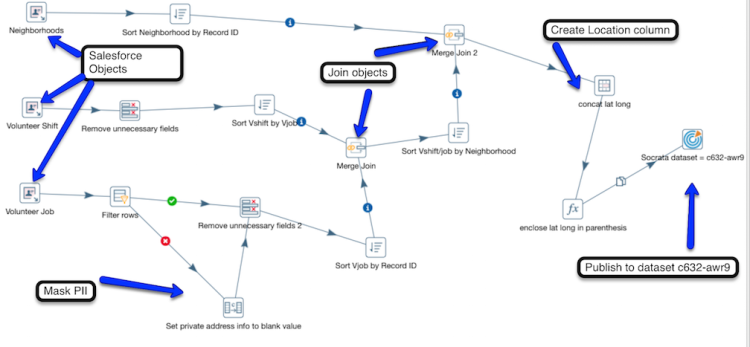
- “Select Rename Values” step, labeled here as Remove Unnecessary Fields. With this you may rename fields and removes those that you will not need on your Socrata dataset.
- Join Salesforce objects:
- Use the “Sort Rows” step to sort by the key you will be joining on.
- Then use the “Merge Join” step to join two objects together.
- Hide PII: The Volunteer Job object has addresses for volunteer meeting locations, some of these locations are private residences. In the Socrata dataset I wish to publish the addresses for only the locations in public places.
- Using the step “Filter Rows”, filter out all attributes where Location Name = “Private Residence”
- The next step “Set Field Values to a Constant” entitled “set private address info to blank”, set the address attributes to null.
- Create a new Location attribute that will geocode:
- Latitude and longitude are in two different columns.
- Concatenate these together using the “Concat Fields” step.
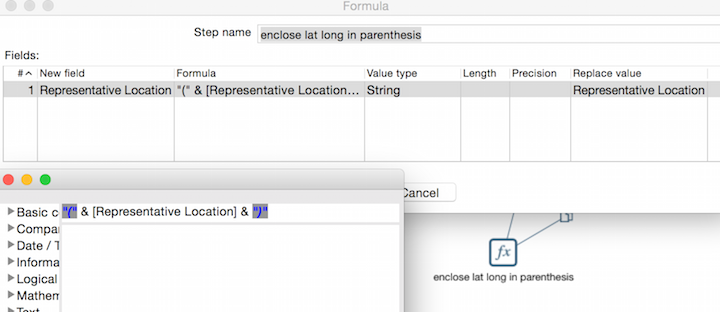
- Lastly, surround your latitude and longitude in parenthesis using the Formula step.
Step 3: Load to Socrata
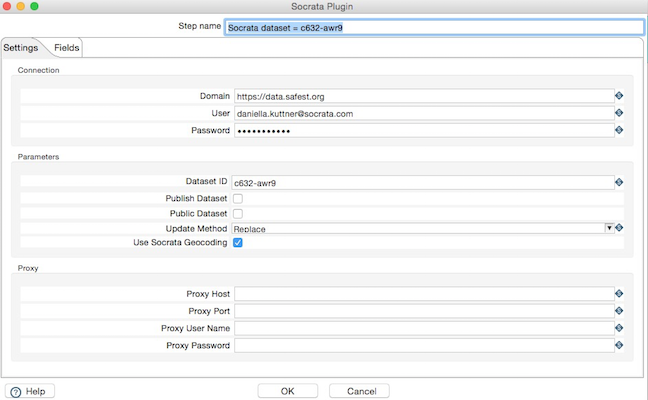
Now that you have downloaded and configured the Socrata plug-in (link provided above) you should see the Socrata Output in the list of Outputs.
Settings Tab
- Configure your credentials. You must be a user on your domain with publishing rights to this dataset.
- Update options:
- Replace: Replaces the entire dataset with this data extract.
- Upsert: Updates any rows that already exist and inserts rows which do not.
Use Socrata geocoding: check yes if one or more columns are type Location
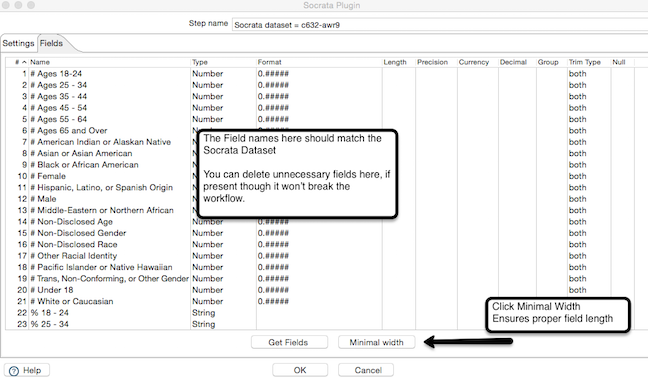
Fields Tab
- Field names should match the Socrata dataset
- You can remove attributes that are not on the dataset, or are not necessary.
- Make sure to click the button ‘Minimum Width’ so the fields do not get accidentally truncated.
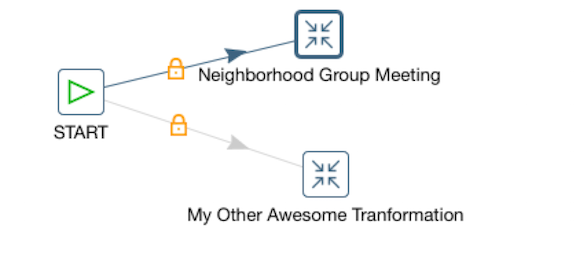
4. Automate
- Open a new job
.kjbfile. - To kick off workflow use the “Start” step.
- To run the ETL job created above connect the “Transformation” step to Start.
- Additionally you can add as many other .ktr files to be run from here.
- Configure this file to be run from a Windows Task Scheduler.
Resources
- Pentaho Steps Documentation
- Salesforce Schema Builder
- Pentaho Salesforce Input Documentation
- How to set up a Windows Task Scheduler with a Kettle Job file